Since long I wanted to extend my fullstack knowledge, I think that even for a frontender it is beneficial to have backend knowledge.
Minimal Application
To learn more full stack I first created a minimal React application to connect to a minimal Rest API.

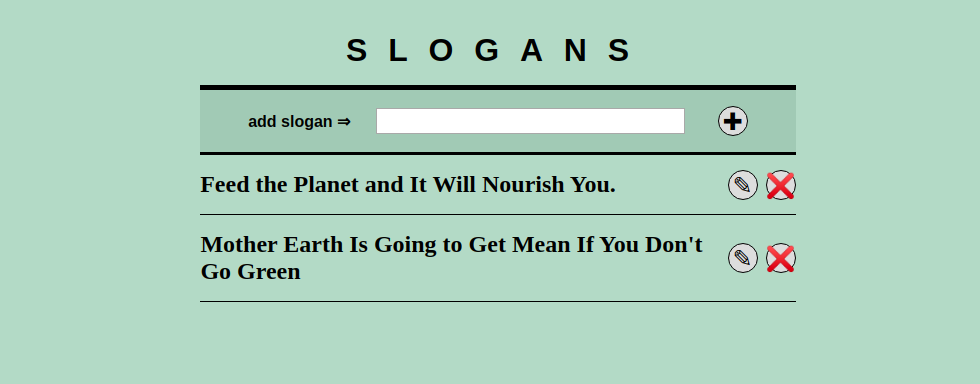
The minimal application stores slogans to save the world. Since this is a mostly a front-end blog I will assume the the React part will be clear. This blog post will focus on the back-end part of this small application. Start the application with the following steps
- clone the repo: https://github.com/jeroenoliemans/sqlite-react.git
- and run the command
npm install && npm run start - check the application at http://localhost:8055/
- and the API should run at http://localhost:8044/api/slogans
Application structure
You can see the main structure of the application below, leaving out many files and only listing the most important files of the application in the structure overview.
- server
- database.js: initializes the sqlite db
- server.js: rest endpoints created with express.js
- site
- services.js: implements the correct calls to the API with values from the front-end
- App.js: the main React file uses services.js
Database.js
The database.js file connects to the sqlite db, if the db is not yet available it creates it with the name set in the code. The sqlite db file will be saved in the root
const sqlite3 = require('sqlite3').verbose();

const DBSOURCE = 'db.sqlite';

let db = new sqlite3.Database(DBSOURCE, (err) => {
If the db and the table is not yet created than SQL will create it with a simple statement since it has only one field, besides the primary key. Once created 2 items will be inserted.
CREATE TABLE slogan (
    id INTEGER PRIMARY KEY AUTOINCREMENT,
    slogan text
);
Server.js
The server.js file can be seen as the backend of the application, or as the API. It is totally based on the express.js framework. The first part initializes the express app en set the needed response headers.
// body parser
app.use(express.json());

// set headers
app.use(function(req, res, next) {
    res.header("Access-Control-Allow-Origin", "*"); // wildcard, only for localhost
    res.header("Access-Control-Allow-Methods", "GET, PUT, POST, DELETE");
    res.header("Access-Control-Allow-Headers", "Origin, X-Requested-With, Content-Type, Accept");
    next();
  });
For production use the headers will not be sufficient. And need to be more strict.
For the rest services.js has all the endpoints for the API, each endpoint is a express.js function (app.get(), app.put()…) which executes some SQL statement in the database and returns an error or a success JSON response with optional data attached. See the method for fetching all slogans (http://localhost:8044/api/slogans)
// get all slogans
app.get("/api/slogans", (req, res, next) => {
    const sql = "select * from slogan";
    let params = [];
    db.all(sql, params, (err, rows) => {
        if (err) {
          res.status(400).json({"error":err.message});
          return;
        }
        res.json({
            "message":"success",
            "data":rows
        })
      });
});
This in a nutshell is all that there is for the serverside part of this application. Up next will be the fetching of the front-end part of the application.
Services.js
Services.js is an abstraction of the calls to the api. For deep control I just created a helper method around the battle-tested, though awfully named XMLHttpRequest. This helper method returns a Promise and makes it easy to apply the HTTP request headers in one place.
// ajax request helper
function get(url, type = 'GET', data) {
    return new Promise((resolve, reject) => {
        let req = new XMLHttpRequest();

        req.open(type, url, true);
        req.setRequestHeader('Accept', 'application/json');
        req.setRequestHeader("Content-type", "application/json");

        req.onload = () => {
            if (req.status == 200) {
                resolve(req.response);
            } else {
                reject(console.log(req.statusText));
            }
        };

        req.onerror = () => {
            reject(console.log('Network Error'));
        };

        (type === 'POST' || type === 'PUT') ? req.send(JSON.stringify(data)) : req.send();
    });
}
The methods using this helper can now be made very simple.
const services = {
    getSlogans: () => {
        return get(`${apiDomain}api/slogans`);
    },
    addSlogan: (slogan) => {
        return get(`${apiDomain}api/slogan`, 'POST', {slogan: slogan});
    },
...
These methods can now be used by any React/ JavaScript component which imports this service file. For example in the main application file App.js.
App.js
App.js is the main React file which most front-end developers will be familiar with. In this file I made some develop shortcuts to redundantly call getSlogans, after each update, delete… calls. This keep the application really simple to reason about with a single source of truth. Perform a altering CRUD operation the refresh the state thus the whole view again from the database. For production use (with a large dataset) this could result in a bad performing application.
// the state to store the result from the API
const [slogans, setSlogans] = useState([]);

    const getSlogans = () => {
        services.getSlogans()
        .then((response) => {
            let responseObject = JSON.parse(response);
            setSlogans(responseObject.data);
        }, (error) => {
            console.log(error)
        });
    }

    const addSlogan = (sloganText) => {
        services.addSlogan(sloganText)
        .then((response) => {
            getSlogans();
        }, (error) => {
            console.log(error)
        });
    };
...
Wrap up
Personally I think that is is valuable for every front-end developer to create a small end-to-end application. It will definitely help communicating and understanding with other developers. And to become a more T-shaped front-end developer. For myself I have learned a lot and hope to find time to connect the same application again but then with an external db for example mysql or postgresql. Happy developing 👍
