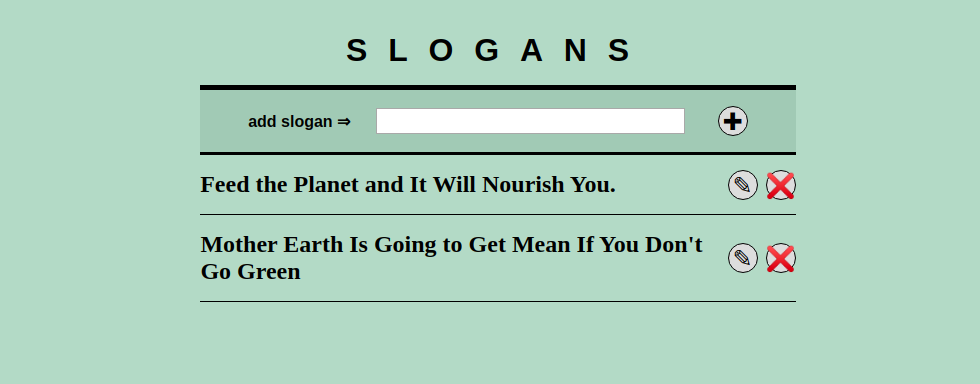
A second example of a minimal fullstack application to help me to extend my fullstack knowledge. The first application used SQLite. The example in this post does exactly the same thing, the main differences are that MongoDB is used to store the slogans and I extended the React side with Typescript.
Minimal Application
To learn more full stack I first created a minimal React application to connect to a minimal Rest API.

This blog post will focus on my experience with MongoDb and Typescript for more explanation about the application check the previous blog post. Start the application with the following steps
- Create a local folder for MongoDB
sudo mkdir -p /data/db - Set the owner for the folder
sudo chown -R $USER /data - install mongoDb follow the guide on https://docs.mongodb.com/manual/tutorial/install-mongodb-on-ubuntu/
- clone the repo: https://github.com/jeroenoliemans/mongodb-react.git
- start mongoDb in te terminal with
mongod - and run the command
npm install && npm run start - check the application at http://localhost:3000/
- and the API should run at http://localhost:3030/api/slogans
About the server side code
The server side code is divided into two node files with the .mjs extension to make use of es6 inside node: server/db.mjs and server/index.mjs
The db.mjs has functions to return the MongoDB connection and to reset and instantiate the collection
The index.mjs is the actual minimal backend for the application, which has all the endpoints for the CRUD actions for the slogans. It keep the MongoDb connection open until the application is closed. As the documentation tells this is the most performing way. All operations of the mongo node client return Promises which makes it use to use. I used a async function for the add endpoint to prevent nesting Promises. I like async functions, hence I do not know yet if they are easier to read and reason about as Promises.
Add endpoint with related async function
app.post("/api/slogan/", (req, res, next) => {
    if (!req.body.slogan) {
        res.status(400).json({"error": "No slogan specified"});
        return;
    }

    try {
      let insertedItem = insertOne(db, 'slogans', req.body.slogan);

      return res.json({
        "message":"success",
        "data": insertedItem
      });
    } catch (error) {
      res.status(400).json({"error": error})
    }
  });

...

// async functions more to use when multiple async ops are required
const insertOne = async (db, collection, slogan) => {
  let collectionCount = await db.collection(collection).find({}).count()
  return await db.collection(collection).insertOne({id: (collectionCount + 1), slogan: slogan});
}
Experience with MongoDB
I did have experience with editing mongo db documents with special tooling like Robo3T and NosqlBooster. This was the first time for me to delve deeper into mongo. I must admit that for a JavaScript developer the experience feels more natural as opposed to SQL.
It took a while before I had some knowledge of the basic best practices.Like should I close the connection after each operation, and setting a custom id of should I use the ObjectID provided by Mongo itself. For the latter question I have the feeling that I took the wrong decision and should have used the ObjectID as the main ID. Leason learned 😉
Remember that ObjectID is an object itself when you choose for ObjectID as reference for the documents.
Experience with Typescript
The effect was minimal, since I was reusing an existing application and adding Typescript to it. Nevertheless I can see the benefit hen building a new application while receiving type errors.
I do not think that hints for default type will help me a lot since I do currently not encounter lot of issues with those. But defining type modals, proper DTO’s with types, function parameters eg… that would help alot. I think it could improve coding speed as well since you receive focused information about the code you already have written.
Typescript in functional component
type SloganProps = {
    slogan: string,
    dbId: number,
    handleSloganRemove: (dbId:number) => void,
    handleSaveSlogan: (dbId:number, sloganText:string) => void
}

const Slogan = ({
    slogan,
    dbId,
    handleSloganRemove,
    handleSaveSlogan
}: SloganProps) => {
    const [sloganText, setSloganText] = useState<string>(slogan);
    const [edit, setEdit] = useState<boolean>(false);

    const handleRemove = (dbId: number) : void => {
        handleSloganRemove(dbId);
    };
...
Personal takeaway
MongoDB for a JavaScript developer feels more natural than SQL, with the latter being able to transfer more logic to the database. And of course having the (dis)advantage of having relations. In a lot of things NoSQL and SQL are absolutely different, but for simple apps both are suitable.
Converting a simple application as this to typescript took less time than expected. For new application I would seriously consider enforce TypeScript. I still do not know if the trade of is worth it. I think it also depends on the type of application; complex fintech app, would not consider to start it without TypeScript. Application displaying items for marketing purposes not so sure is TypeScript would be a requirement…

